Adding a Custom WMS, WMTS, WFS, or ESRI Layer
Add OGC-compliant WMS, WMTS, WFS, or ESRI layers from Web Services to view imagery and vector data in the viewport.
On the side panel, select the Layers icon
 . The Layers pane opens.
Select Add Layer. The New Layer Settings dialog opens.

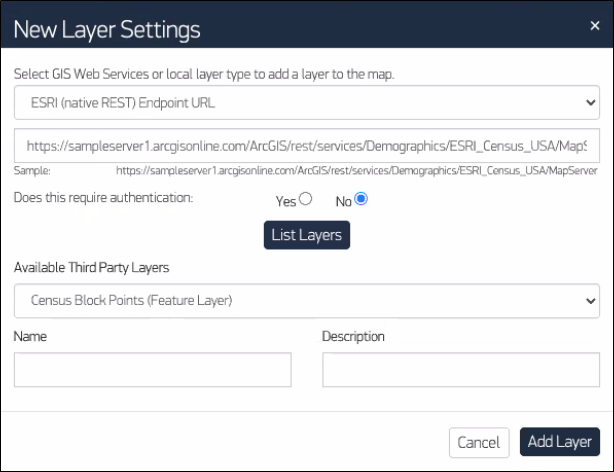
New Layer Settings Dialog
In the drop-down list, select the type of layer you want to add (e.g., WMS, WMTS, WFS, ESRI).
In the text field, enter the URL for your layer.
Some browsers no longer support mixed content (i.e., http:// links within https:// websites). We recommend adding layers that use an https:// URL to avoid providing mixed content to unsupported browsers.
If authentication is required, select Yes. In the fields, enter your login credentials (currently, username and password are the only supported authentication option).
Some custom layer endpoints are publicly available and do not require authentication.
When adding a supplemental layer, G-EGD attempts to securely transmit information to and from the third-party server using Cross-Origin Resource Sharing (CORS). CORS is a mechanism that allows secure, cross-site data transfers. If the third-party server does not allow access from Maxar domains (or if CORS fails for any other reason), a fallback mechanism is used to proxy the authentication request. If this fallback strategy fails, the layer cannot be viewed from within G-EGD.
Select List Layers. When a successful connection occurs, the Available Third Party Layers drop-down list appears.

New Layer Settings Dialog with Available Layers Fields
In the Available Third Party Layers drop-down list, select a layer.
In the Name field, enter a name for the layer.
(Optional) In the Description field, enter a description for the layer.
Select Add Layer. The New Layer Settings dialog opens. The new layer appears at the top of the Layers pane and is automatically turned on.

Custom Layers Overlay in the Viewport

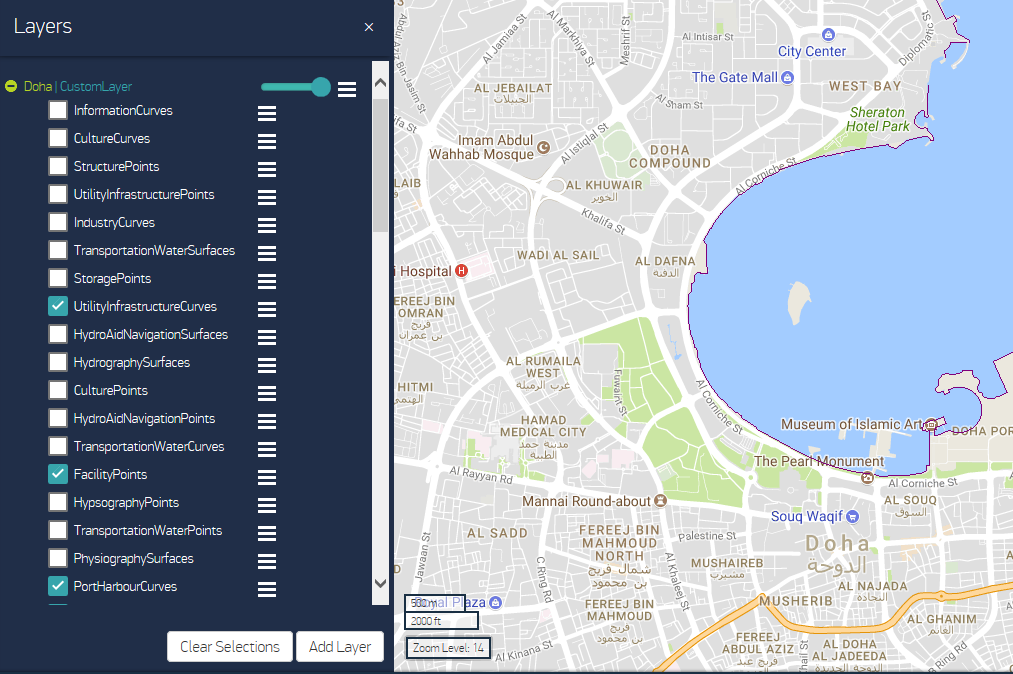
| In the Layers pane, select Clear Selections to turn off all selected layers. |