Choosing Images
When you are in Project Edit mode (see Editing a Project), you can select the images you want to include in a project.
Open
Right-click on your project area in the viewport. From the context menu, select Choose Images.
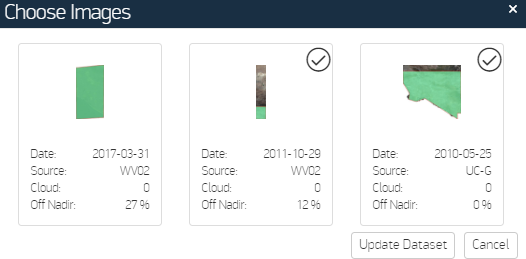
The Choose Images dialog opens. The images beneath your cursor are shown in the dialog. The portion of the image that covers your viewport is highlighted in green. Selected images are indicated by a check mark in the upper right corner of the image.

Choose Images Dialog
Do one of the following:
Select an Image Hover over the image you want to select. The Select Image
 icon appears; select the icon to add the image to your project.
Remove an Image Hover over the check mark on the image you want to remove. The Remove Image
 icon appears; select the icon to remove the image from your project.
Select Update Dataset.