Editing a Project
Editing a project allows you to visualize your selected images, manually select new images, remove images that don't meet your needs, and stack the images to best meet your project requirements. You can edit a project immediately after creating it, or you can open a project in edit mode.
On the side panel, select the Projects icon
 . The Projects pane opens.
Select Manage Projects. The Projects dialog opens.
Next to

Select a cell using the cell locator grid.
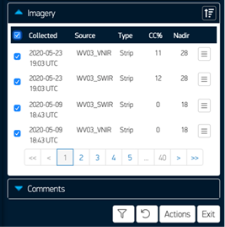
Expand the Imagery section. Select the checkboxes next to the images you want to include in the project. Clear the checkboxes next to the images you want to exclude.
Select the checkbox at the top of the imagery list to select all of the available images on the page. Clear the checkbox to remove all of the selected images on the page. The pagination arrows at the bottom of the Imagery section let you navigate through multiple pages of imagery, if available.
(Optional) Drag images in the list to rearrange their stacking order. Use the Choose Images dialog to compare imagery and select different imagery for the project (see Choosing Images).
Select the next cell using the arrow buttons, or select a new cell using the cell locator grid. Make additional image selections for each cell in the project.
To entirely replace your selections for the project, select Reset.
To apply additional filtering to your project, select the Filter button.
 More Information
Acquisition Date / Time of Day Date and time ranges for when the image was acquired.
The time of day filter does not return mosaic imagery.
Be sure to format date and time ranges correctly.
Acquisition Date Format (yyyy-mm-dd)
Use the calendar picker to automatically format dates.
Date formats such as dd-mm-yyyy are not accepted.
Time of Day Format HH:MM AM/PM
Time ranges must be entered manually.
You must include AM or PM. Enter a space between the time and AM or PM (e.g., 08:17 AM, 12:42 PM).
Time ranges must use 12-hour format. 24-hour format is not accepted.
You will receive an error if you format a date or time range incorrectly.
Cloud Cover The maximum cloud cover percentage. (0%–50%)
The cloud cover filter applies to the entire strip, not your area of interest. Using this filter may filter out strips that have good coverage over your area but are cloudy elsewhere.
Source The source(s) you want to use for the imagery.
Third-party data sources will be available if they are turned on for your account.
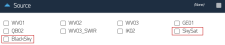
Sensor Type Select the Maxar sensor(s). (Satellite, Aerial, Radar)
Content Type
When are finished making changes, select Exit.

Project Edit Interface Overview
The Project Edit interface is slightly different depending on if you created a dynamic grid project (i.e., not aligned with the coordinate grid) or a coordinate grid project. Dynamic grid projects are centered within an arbitrary grid with 1-degree-size cells, while coordinate grid projects show the cell designations. The top left cell is active.
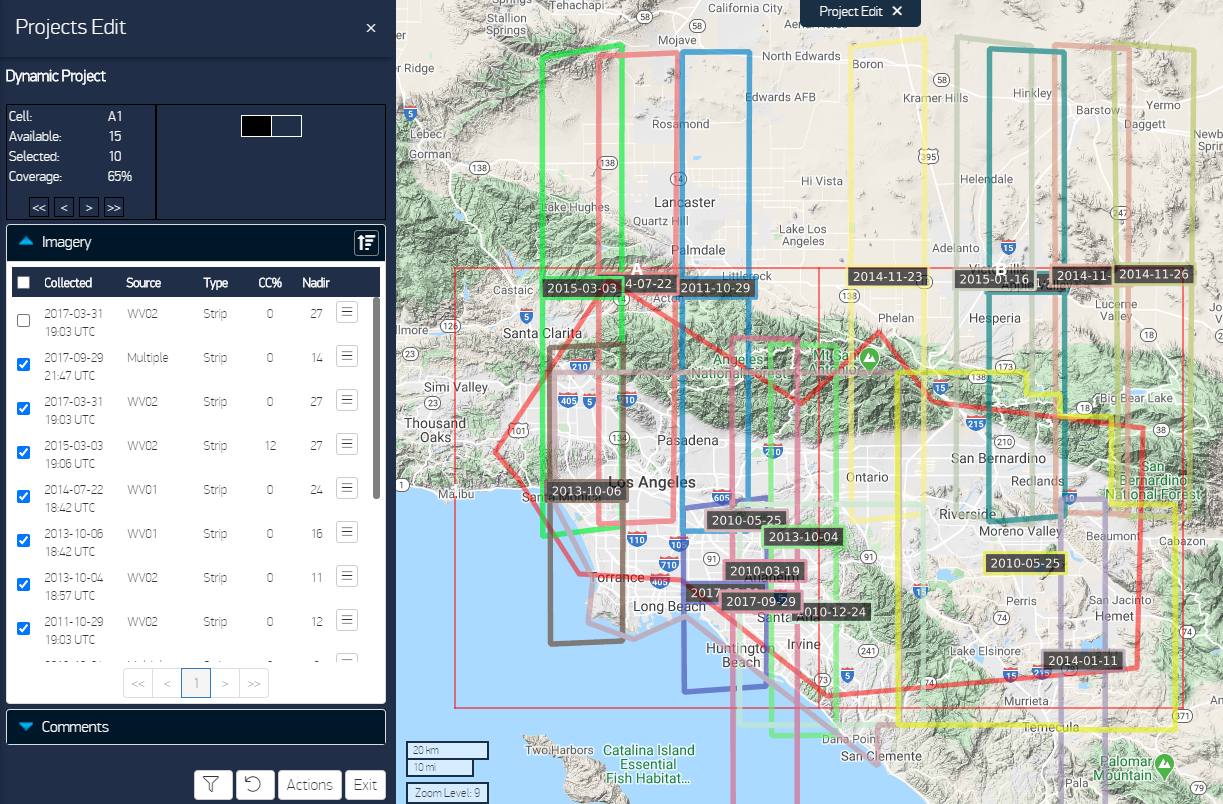
Project Edit Interface: Dynamic Grid
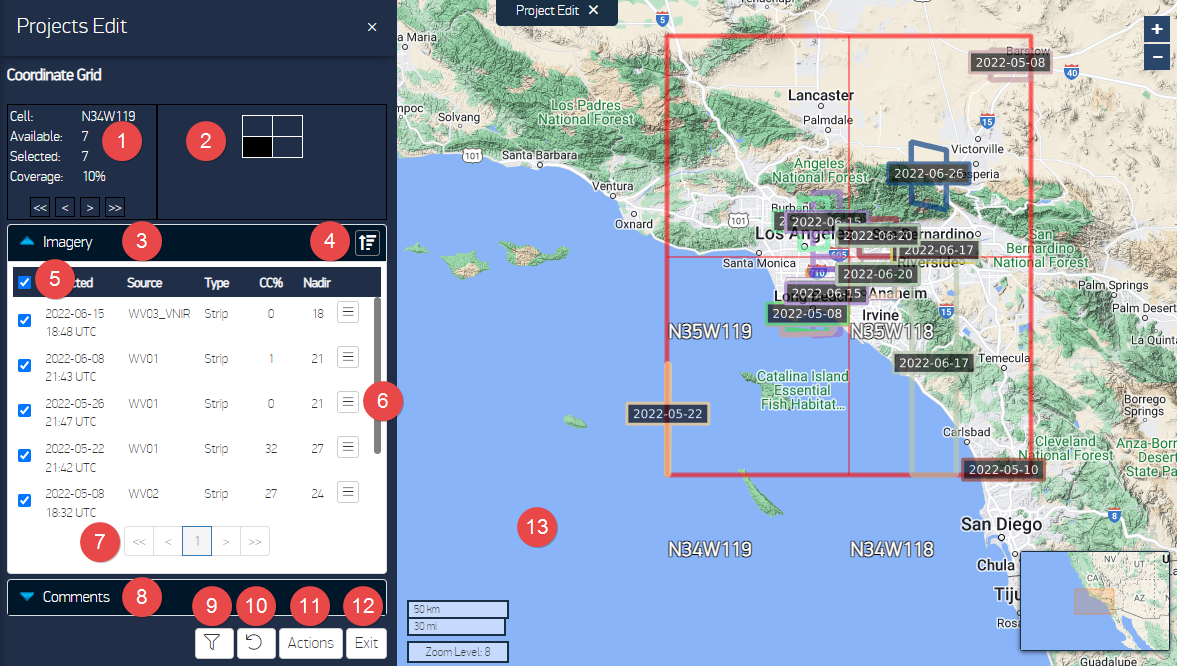
Project Edit Interface: Coordinate Grid
| Name | Description | ||||
|---|---|---|---|---|---|---|
1 | Cell Details | Provides information about the active cell.
Use the First, Previous, Next, and Last | ||||
2 | Cell Locator | The black square indicates the current cell. Hover over a cell to highlight it in the viewport. Select a cell to zoom to it and make it active. | ||||
3 | Imagery List | Select the checkboxes for the images you want use in your project. Clear the checkboxes for the images you want to exclude. Only selected images are shown in the viewport. For dynamic grid projects, clearing the checkbox for an image in one cell removes it from the project even if you selected it for a prior cell. For coordinate grid projects, each cell has a separate cell list, so selections for one cell do not affect the selections for adjacent cells. Each change you make is automatically saved. | ||||
4 | Move Selected Images to Top | Select this button to move all the images you have selected to the top of the Imagery list. Unselected images are moved to the bottom of the list. | ||||
5 | Select/Deselect All | Select this checkbox to select all of the available images on the page. Clear the checkbox to remove all of the selected images on the page. | ||||
6 | Image Menu | This menu also opens when you right-click an image, and includes the following additional options:
See Using the Image Menu. | ||||
7 | Pagination Arrows | Navigate through multiple pages of imagery, if available. For cell-based projects, you can navigate through imagery for that cell. | ||||
8 | Comments | Expand this section to see comments associated with a project. See Commenting on a Project. | ||||
9 |
| |||||
10 | Reset | Discards your selections and resets the project. All filters are discarded. However, new images that were added to the online catalog and that meets the criteria selected when the project was created will be included. | ||||
11 | Actions | Export a shapefile of your project, and export comments. Additionally, users with the Large Area Download account configuration can create mashups. | ||||
12 | Exit | Closes the Project Edit interface. | ||||
13 | Viewport | Your AOI is overlaid on an arbitrary grid of 1-degree cells (dynamic grid) or on the coordinate grid. Footprints for the selected images are shown with image dates up to zoom level 10; imagery displays at zoom levels 11 and higher. |